
Home › Install guides › Install the Uplivra server
Install guide · Start hereInstall the Uplivra server
Put Uplivra on an Ubuntu computer or virtual machine, sign in, and start monitoring. For most businesses this is the only install you need: the server has its own collector built in.
Uplivra Technologies LLC · Guide for Uplivra 26.10 · Updated 25 September 2026 · Latest version: https://uplivra.com/guides/server.html
What you'll end up with
One computer running the Uplivra server: the web interface you sign in to, the database that keeps your history, the alerting, and a collector that checks the devices on this network. Plan on about 30 minutes, most of it waiting for downloads.
Before you start
You need:
- A computer or virtual machine that stays switched on. For up to 250 devices: 4 CPU cores, 8 GB memory and a 100 GB disk (minimum 2 cores, 4 GB and 50 GB). See What computer do I need? for larger networks.
- Ubuntu Server 24.04 LTS installed on it (22.04 and 26.04 also work). Intel/AMD or ARM, including a Raspberry Pi 5 with an NVMe drive for very small sites.
- A fixed IP address for it on your network, for example 192.168.1.20. Ask whoever manages your router which address to use, or pick one outside your router's DHCP range.
- Your Uplivra account on the customer portal. The free plan covers 15 devices; you don't need a license key yet.
- About 10 minutes of internet access for the install. Monitoring itself doesn't need the internet.
If you need to install Ubuntu first
- Download Ubuntu Server 24.04 LTS from ubuntu.com/download/server.
- Create a virtual machine with the size above, attach the downloaded ISO file as its CD/DVD drive, and start it. (On a physical PC, write the ISO to a USB stick with a tool such as balenaEtcher or Rufus and boot from it.)
- Accept the defaults, except: on Network, you can leave DHCP on; Uplivra's setup can set the fixed address later. On Profile, choose a username and password you'll remember. On SSH, tick Install OpenSSH server so you can copy files to it.
- When it says Reboot now, remove the ISO and restart. Sign in with the username and password you chose.
Step 1: Download Uplivra
- On your own PC, open the customer portal, sign in, and click Downloads.
- Download uplivra-linux.tar.gz. It contains everything: the installer, the programs for Intel/AMD and ARM, and the Windows collector.
Step 2: Copy it to the server
The easiest way from Windows is WinSCP (free, from winscp.net):
- Open WinSCP. In Host name type the server's IP address, then its User name and Password (the ones you chose when installing Ubuntu). Click Login, and Yes if it asks about the server's key.
- Drag uplivra-linux.tar.gz from your Downloads folder into the right-hand panel (your home folder on the server).
From a Mac, Linux, or Windows 10/11 PowerShell, you can instead type (replace you and the address):
scp uplivra-linux.tar.gz you@192.168.1.20:Step 3: Run the installer
Sign in to the server, either at its own screen or with SSH (ssh you@192.168.1.20 from PowerShell or Terminal), and run these three commands one at a time:
tar xzf uplivra-linux.tar.gz
cd uplivra
sudo bash install.sh
sudo asks for your password. Nothing appears as you type it; that's normal. Type it and press Enter.
Step 4: Answer the setup questions
Press Enter to accept any suggestion shown in [brackets].
| Question | What to answer |
|---|---|
| Terms of service | Read the summary, type show to read them in full, then type I agree |
| What should this computer be? | 1 (Uplivra server with a collector) |
| Computer name | A short name such as uplivra |
| Set the network address now? | yes if the server doesn't have its fixed address yet |
| Which network interface? | The one marked connected |
| VLAN tag | Press Enter, unless your network team told you a VLAN number |
| How does it get its address? | 1 (Fixed address) |
| IP address and prefix | Your chosen address with /24 at the end, for example 192.168.1.20/24 |
| Default gateway | Your router's address, usually the same with .1 at the end |
| DNS servers | Your router or domain controller, for example 192.168.1.1 |
| Search domain | Your Windows domain if you have one (for example corp.local), otherwise Enter |
| Jumbo frames | no, unless your network team set every switch for MTU 9000 |
| IPv6 | no, unless you use it |
| Web proxy | Enter, unless your network needs a proxy for the internet |
| Time zone | Your region, for example America/Chicago or Europe/London |
| Time servers | Your domain controller or firewall if it provides time, otherwise accept the suggestion |
| Email, name, password | Your sign-in for the Uplivra web interface. At least 12 characters; a short sentence works well |
| Port for the web interface | Enter (8443) |
| Security updates automatically | yes |
Setup then shows a summary. Check it and type yes. It takes 2–5 minutes and shows each step as it goes:
==> Step 1 of 14: Record that the terms of service were accepted
==> Step 2 of 14: Set the computer name to uplivra
...
If you changed the network address and were connected over SSH, your connection drops at the very end. That's expected: reconnect to the new address.
Step 5: Sign in
Setup finishes with a box like this:
   Uplivra is ready. Open this in your web browser:
https://192.168.1.20:8443/- Open that address in your browser.
- The browser warns that the connection isn't private. That's because Uplivra made its own certificate. Click Advanced, then Continue (or Proceed). To get rid of the warning for good, get a free Let's Encrypt certificate later under Settings › Certificates › Web interface certificate (with certbot, or automatically through Cloudflare DNS), or install your company's certificate there. Collectors keep working either way.
- Sign in with the email and password you chose in step 4.
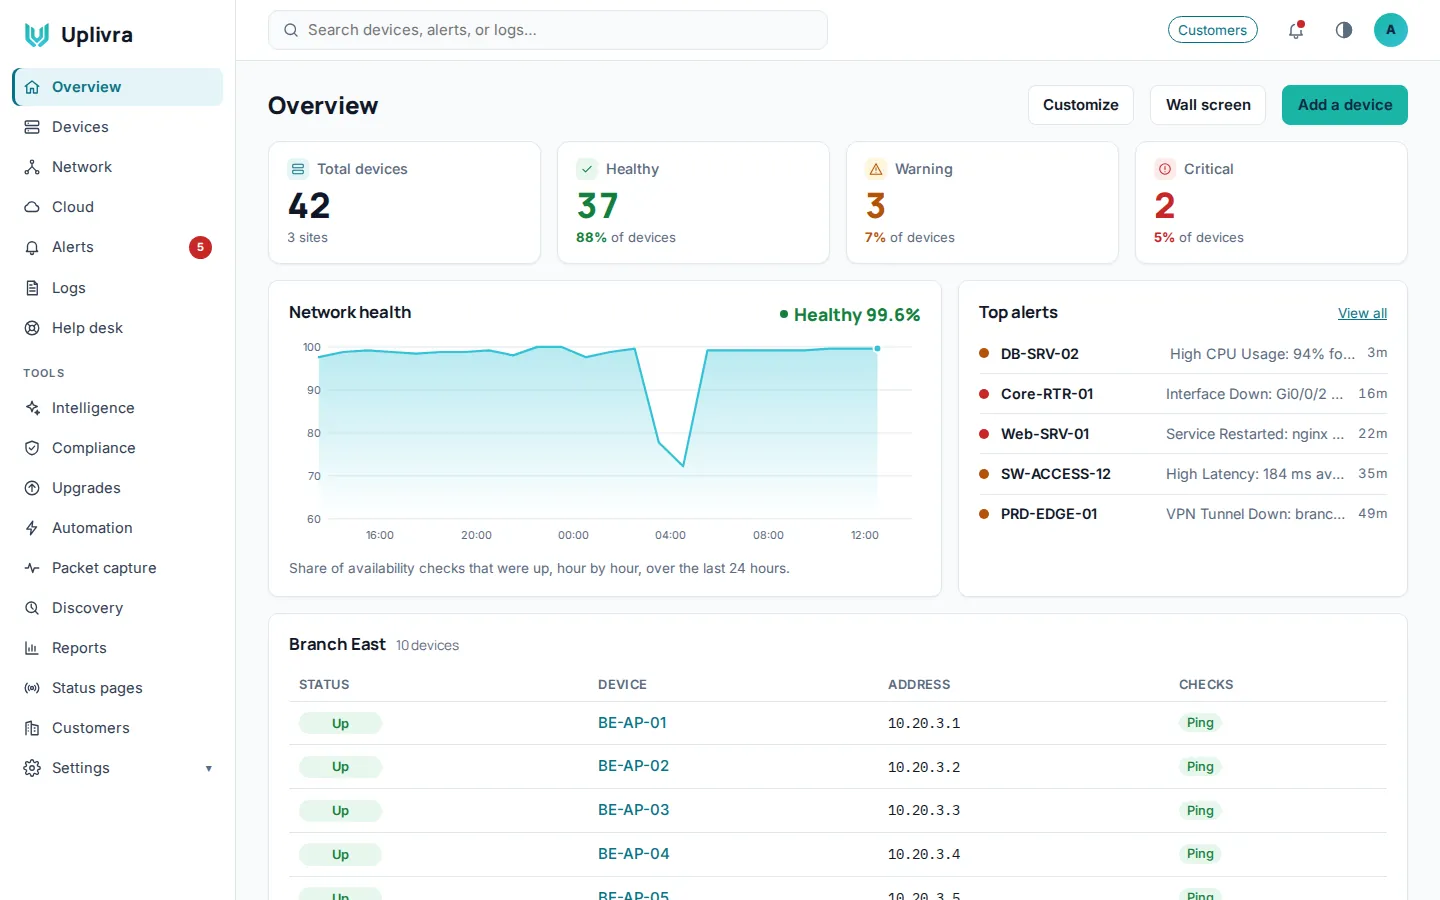
Step 6: Start monitoring
Setup already created your first site, Main office, and connected the server's own collector to it. Rename the site under Settings › Sites and collectors if you like.
- Find devices. Open Discovery, add a scan for your network (for example
192.168.1.0/24) and click Run. Within a few minutes it lists what answered: addresses, names and, for SNMP devices, what they are. Nothing is monitored until you add it, so tick the devices you want and add them. You can also add one at a time with Devices › Add a device. - Choose where alerts go. Open Settings › Where alerts go, add your email address, a Microsoft Teams or Slack channel, or a webhook, and click Send test.
- Add SNMP for switches, routers, firewalls and printers so Uplivra can see ports, CPU and temperatures. On the server, save the SNMP community or SNMPv3 login once:
sudo uplivra vault init
sudo uplivra vault set-snmp -name office-switches
Then pick office-switches in the device's SNMP check. Passwords stay on the collector; the web interface never sees them.
Other sites
Each additional office or data closet needs a collector. See Add a collector on Linux or on Windows.
More than 15 devices, or modules
Buy a plan on the customer portal, then copy the license key into Settings › License and modules. Nothing needs reinstalling.
Firewall ports
| Port | From | For |
|---|---|---|
| 8443/tcp | Your PCs, and collectors at other sites | Web interface and collectors |
| 514/udp and tcp | Devices sending logs | Syslog (only if you use logs) |
| 2055, 4739, 6343, 9995/udp | Routers and firewalls | Traffic flows (only if you use Network Pro) |
| Outbound 443/tcp | This server | License check once a day, updates. Optional |
Setup opens these in Ubuntu's own firewall (ufw) if it's switched on.
Check it's healthy
systemctl status uplivra-server uplivra-collectorBoth should say active (running) in green. Press q to get back. To see recent messages:
sudo journalctl -u uplivra-server -n 50Troubleshooting
| What you see | What to do |
|---|---|
| "Run it with sudo" | Put sudo in front of the command |
| "doesn't match SHA256SUMS" | The download was damaged. Download it again |
| The browser can't reach the address | Check the server's address with hostname -I, and that your PC is on the same network or allowed through the firewall |
| "This computer is below the minimum" | Give the VM more memory or disk, or continue for a small test only |
| Forgot your password | On the server: sudo uplivra user reset-password -email you@company.com |
Still stuck? Email support@uplivra.com with what you see, and the output of sudo journalctl -u uplivra-server -n 200.
For experienced admins
- Preview the steps without changing anything:
sudo bash install.sh -dry-run. - Unattended installs:
sudo uplivra setup -save-answers answers.jsonrecords your answers (without passwords);sudo bash install.sh -answers answers.jsonreplays them. - Re-run the questions later:
sudo bash install.sh -reconfigure. - Settings live in
/etc/uplivra/server.json; data in PostgreSQL and/var/lib/uplivra. Back up both. - Updates: see Updating Uplivra.